Install ownCloud on CentOS 7
This installation assumes you are starting from a fresh CentOS 7.x Installation with no other services installed.
Update your OS
yum -y update
Install Apache, SSL, PHP, MariaDB and Nano
yum -y install httpd mod_ssl openssl php php-mysql php-posix mariadb-server mariadb sqlite php-dom php-mbstring php-gd php-pdo nano
*php-posix required for ownCloud’s occ command line configuration software.
Start Apache and MariaDB
systemctl start httpd.service
systemctl start mariadb.service
Set Apache and MariaDB to autostart on boot
systemctl enable httpd.service
systemctl enable mariadb.service
Add http and https to the firewall
firewall-cmd --permanent --zone=public --add-service=http
firewall-cmd --permanent --zone=public --add-service=https
firewall-cmd --reload
Download ownCloud
wget https://download.owncloud.org/community/owncloud-9.0.0.tar.bz2
Install bzip2 (Required to extract the ownCloud software)
yum install -y bzip2
Extract the software
tar -jxvf owncloud-7.0.0.tar.bz2 -C /var/www/html/
Set Apache ownership permissions
chown -R apache:apache /var/www/html/owncloud/
Database Configuration
Configure MariaDB
Running the following command and answering the associated prompts will help secure the database.
mysql_secure_installation
NOTE: RUNNING ALL PARTS OF THIS SCRIPT IS RECOMMENDED FOR ALL MariaDB SERVERS IN PRODUCTION USE! PLEASE READ EACH STEP CAREFULLY! In order to log into MariaDB to secure it, we'll need the current password for the root user. If you've just installed MariaDB, and you haven't set the root password yet, the password will be blank, so you should just press enter here. Enter current password for root (enter for none):
OK, successfully used password, moving on... Setting the root password ensures that nobody can log into the MariaDB root user without the proper authorisation. Set root password? [Y/n]
New Password: RootDatabasePassword
Re-enter new password: RootDatabasePassword
Password updated successfully! Reloading privilege tables.. ... Success! By default, a MariaDB installation has an anonymous user, allowing anyone to log into MariaDB without having to have a user account created for them. This is intended only for testing, and to make the installation go a bit smoother. You should remove them before moving into a production environment. Remove anonymous users? [Y/n]
... Success! Normally, root should only be allowed to connect from 'localhost'. This ensures that someone cannot guess at the root password from the network. Disallow root login remotely? [Y/n]
... Success! By default, MariaDB comes with a database named 'test' that anyone can access. This is also intended only for testing, and should be removed before moving into a production environment. Remove test database and access to it? [Y/n]
- Dropping test database... ... Success! - Removing privileges on test database... ... Success! Reloading the privilege tables will ensure that all changes made so far will take effect immediately. Reload privilege tables now? [Y/n]
 ... Success!

Cleaning up...

All done!  If you've completed all of the above steps, your MariaDB
installation should now be secure.

Thanks for using MariaDB!
Create the ownCloud database user and database
mysql -u root -p
Enter password: RootDatabasePassword
Welcome to the MariaDB monitor.  Commands end with ; or \g.
Your MariaDB connection id is ##
Server version: 5.5.47-MariaDB MariaDB Server

Copyright (c) 2000, 2015, Oracle, MariaDB Corporation Ab and others.

Type 'help;' or '\h' for help. Type '\c' to clear the current input statement.

MariaDB [(none)]> create database owncloud;
Query OK, 1 row affected (0.00 sec)

MariaDB [(none)]> create user 'owncloud'@'localhost' identified by 'OwnCloudDatabaseUserPassword';
Query OK, 0 rows affected (0.00 sec)

MariaDB [(none)]> grant all on owncloud.* to 'owncloud'@'localhost';
Query OK, 0 rows affected (0.00 sec)

MariaDB [(none)]> flush privileges;
Query OK, 0 rows affected (0.00 sec)

MariaDB [(none)]> exit
Configure Apache
IP.ADD.RE.SS/owncloud Method
Add the following lines to the Apache owncloud config file
nano /etc/httpd/conf.d/owncloud.conf
Alias /owncloud /var/www/html/owncloud

Options Indexes FollowSymLinks
AllowOverride Allubuntu 16.04 release date
Order allow,deny
allow from all
Save the file
+
Save modified buffer (ANSWERING "No" WILL DESTROY CHANGES) ? Y
File Name to Write: /etc/httpd/conf.d/owncloud.conf
owncloud.domain.com Method
Use this method if you will be accessing your ownCloud installation through a domain name vs. using an IP address as shown above.
Create the CSR (certificate signing request)
In order to add instant security before purchasing an SSL (Secure Socket Layer) certificate, you’ll need to create a self-signed certificate.
Use the following link to create the CSR.
https://www.howtowebhost.com/how-to-create-a-csr-certificate-signing-request-in-linux-using-openssl/
Create the Self-Signed Certificate
*Make sure you use the same files names you created in the previous steps!
openssl x509 -req -days 365 -in owncloud.domain.com.csr -signkey owncloud.domain.com.key -out owncloud.domain.com.crt
Move the certificate files to a secure location
mkdir /etc/httpd/conf/ssl
mv owncloud.domain.com.csr /etc/httpd/conf/ssl/
mv owncloud.domain.com.key /etc/httpd/conf/ssl/
mv owncloud.domain.com.crt /etc/httpd/conf/ssl/
Configure Apache to use listen on Port 443
Add the following lines to the Apache configuration file:
nano /etc/httpd/conf/httpd.conf
# Listen: Allows you to bind Apache to specific IP addresses and/or
# ports, instead of the default. See also the
# directive.
#
# Change this to Listen on specific IP addresses as shown below to
# prevent Apache from glomming onto all bound IP addresses.
#
#Listen 12.34.56.78:80
Listen 80

<IfModule mod_ssl.c>
    Listen 443
</IfModule>
Save the file
+
Save modified buffer (ANSWERING "No" WILL DESTROY CHANGES) ?
File Name to Write: /etc/httpd/conf/httpd.conf
Add the following lines to the Apache config file
nano /etc/httpd/conf.d/owncloud.domain.com
<VirtualHost *:80>
    ServerAdmin     red01montecarlo@yahoo.com
    ServerName    owncloud.thomasandsofia.com
    DocumentRoot    /var/www/html/owncloud
    ErrorLog        /var/log/httpd/owncloud-error.log
    TransferLog     /var/log/httpd/owncloud-access.log
    LogLevel warn
</VirtualHost>
<VirtualHost *:443>
    ServerAdmin     red01montecarlo@yahoo.com
    ServerName    owncloud.thomasandsofia.com
    DocumentRoot    /var/www/html/owncloud

    SSLEngine on
    SSLCertificateFile /etc/httpd/conf/ssl/owncloud.thomasandsofia.com.crt
    SSLCertificateKeyFile /etc/httpd/conf/ssl/owncloud.thomasandsofia.com.key

    ErrorLog        /var/log/httpd/owncloud-error.log
    TransferLog     /var/log/httpd/owncloud-access.log
    LogLevel warn
</VirtualHost>
Save the file
+
Save modified buffer (ANSWERING "No" WILL DESTROY CHANGES) ? Y
File Name to Write: /etc/httpd/conf.d/owncloud.conf
Restart MariaDB
#
systemctl restart httpd.service
systemctl restart mariadb.service
Install ownCloud and configure the Admin user
Using the Command Line
Create occ alias
Since we’ll be using the ownCloud occ (ownCloud Console), and this command must be ran as the web server user, create an alias to reduce typing.
alias occ="sudo -u apache /var/www/html/owncloud/occ"
Install ownCloud and setup the database
occ maintenance:install --database "mysql" --database-name "owncloud" --database-user "ownCloudDBUser" --database-pass "ownCloudDBPassword" --admin-user "ownCloudAdmin" --admin-pass "ownCloudAdminPassword"
ownCloud is not installed - only a limited number of commands are available
ownCloud was successfully installed
Complete Setup Using Web Interface
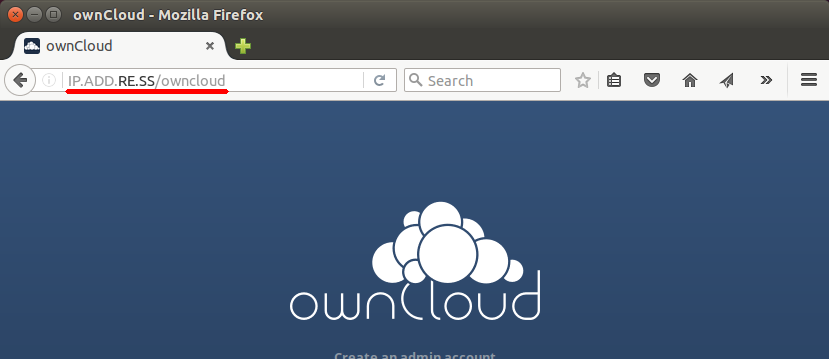
IP.ADD.RE.SS/owncloud Method
Type the IP address of your server directly into your browser’s address bar, followed by /owncloud
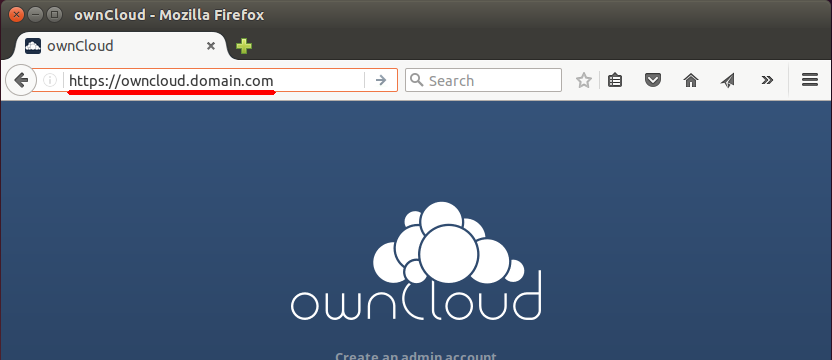
owncloud.domain.com Method
Enter https://owncloud.domain.com (replace “domain.com” with your actual domain) directly into your browser’s address bar.
Enter your Administrator username and password
In the “Create an admin account, enter the username and password you wish to use for your administrator.
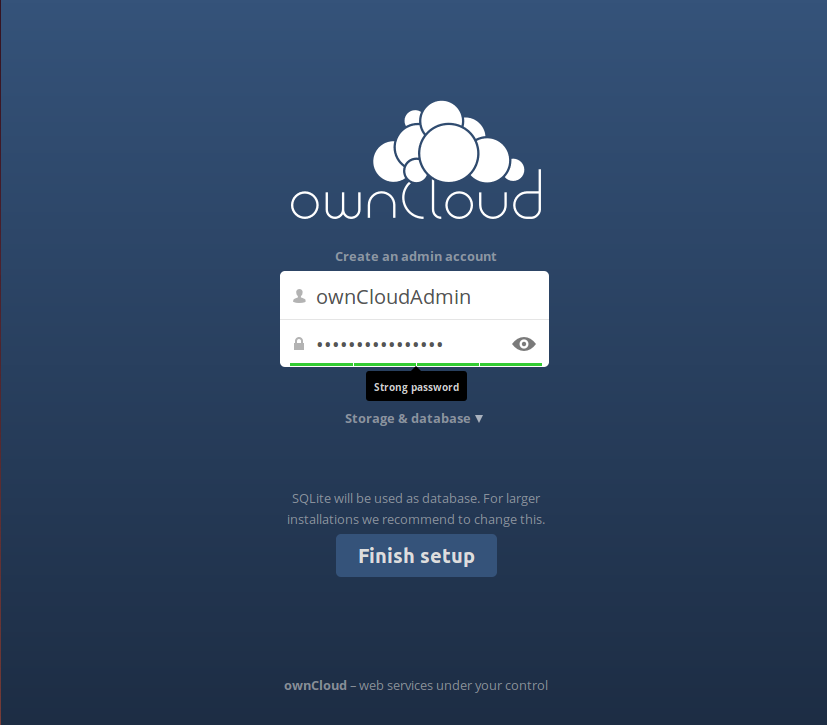
Configure the Storage location
To access the storage and database configuration settings, click “Storage & database” located directly under the “Create and admin account” window.
The default storage path for this configuration is “/var/www/html/owncloud/data”. Leave this as it is for now. We will manually adjust it in the upcoming steps.
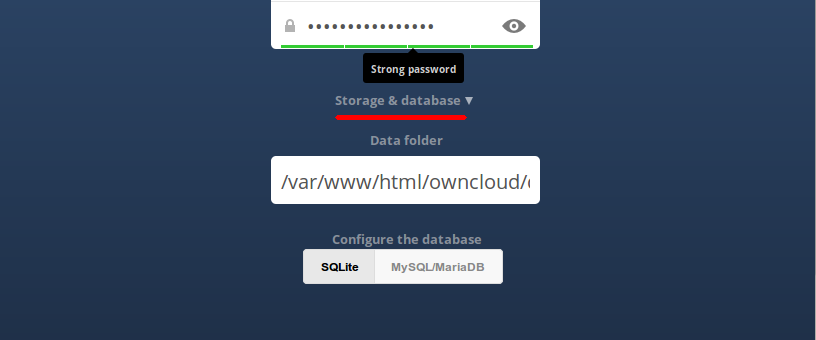
Configure the Database
In the “Configure the database” window, click “MySQL/MariaDB”, then enter the username, password and database name you used when you configured the database earlier. Leave “localhost” as it is to ensure remote users cannot access the database.
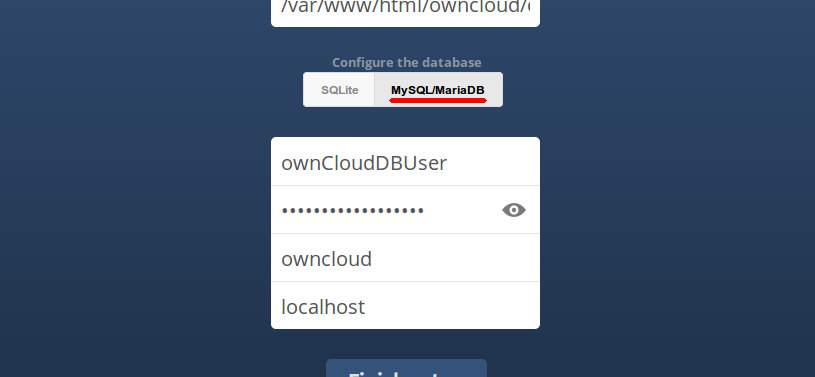
Save the settings
Click the [Finish setup] button at the bottom of the page.
Exit
Close your web browser. We have some more command line work to do!
Secure the data folder
By default, ownCloud installs the data folder directly on the website’s document root. This could allow access to the folder if the site’s .htaccess or folder’s index file becomes corrupt. Instead, we’ll move it to an “off-site” folder.
Move the data/ folder
mv /var/www/html/owncloud/data /home/owncloud-data
*It has been noted by other users that using “/home/owncloud/data” or other matching folder naming techniques tend to fail, so we use “/home/owncloud-data” which has proven to work.
Configure ownCloud to use the new location
nano /var/www/html/owncloud/config/config.php
Now change the following line:
'datadirectory' = '/var/www/html/owncloud/data',
To:
'datadirectory' = '/home/owncloud-data',
Save the change
+
Save modified buffer (ANSWERING "No" WILL DESTROY CHANGES) ? Y
File Name to Write: /var/www/html/owncloud/config/config.php
Restart Apache
systemctl restart httpd.service
Comments
So empty here ... leave a comment!